We've moved!

You should be automatically redirected in 5 seconds. If not, stop by
http://www.vicariouslyvintage.com/
Don't forget to update your bookmarks.

Showing posts with label Crafting. Show all posts

Sunday, June 5, 2011

Updated mirror

Just a quick post to show what I did with a mirror that Hubba wouldn't part with. He offered for me to paint it. That means he finally started trusting my (spray can) trigger finger.

Before:

After:


Apparently I needed stupervision. Since this is Hubba's kitty, I have to wonder if he sent her....


I hung it in a corner in our bedroom, & he loves it!


See that lampshade? ^^

That's another post to come.


Sunday, May 8, 2011

"Clock Face"-lift


The perpetrator..... A brushed silver look clock..... We got it when we were married. It was on our registry. It was cool at the time. Actually it still wasn't a bad clock, I just refused to buy a new clock, and this one wasn't fitting into any of the rooms in the house.


I took the whole thing apart with some ideas on what to do. I decided on some parchment look paper we had. Unfortunately, the paper didn't cover the whole face, so I opted for a torn collage look. I used some Elmer's school glue & water to make a decoupage type adhesive. Once it was dry, I'd trim it.


Except that I think I added WAY too much water to the glue mix, and once it was dry, it was barely stuck in most places. The gob of paper came right off. Rather than even consider going that route again, I remembered I had just bought a remnant of burlap last Thursday. Yes, this would be perfect & even better for the look I was going for. I was planning on using scrapbook number stickers for the paper background, but with the burlap, I wasn't sure how that would work. I scrounged the house looking for something to use on the burlap. I was considering buying some wood disks, maybe some wooden numbers. I really didn't feel like going out, though. I did go to True Value, but that's only a few blocks from my house. I needed spray adhesive for the burlap. I just wasn't up to rummaging through the "big box" stores.


I was trying to come up with a way to make sure the "numbers" were aligned, so I jumped onto google images & did a search for printable clock. As a homeschooling momma, I knew those would be plentiful.


I printed one out, cut around the edge & did a loop of tape & centered it onto my burlap.


Then I added my "numbers." I found 2 packs of 6 buttons in one of my sewing boxes. They were solid brown, so using an emery board, I roughed them up a bit.


I removed my printed clock & voila! Now I just needed to put the clock back together....


Except that when I did, I realized I'd put the buttons too far to the outer edge, and the clock rim & glass wouldn't fit back on. I had to very carefully peel the buttons away & scootch them in a bit more. While the clock was a part I used Krylon's Ruddy Brown primer, followed by a couple coats of Krylon's Celery spray paint in gloss. Once those were dry, I used the aforementioned emery board & roughed it up a bit, giving it that beautiful distressed look I'm so fond of.


Here it is hanging in the kitchen again (pics of the kitchen will be soon to follow, since I just finished it-mostly-up a couple days ago).


And because everybody loves a good side by side before & after.....


This post is part of the following linky parties:

Making the World Cuter Monday
Craftastic Monday at Sew Can Do
Mad Skills Party @ Mad In Crafts
Get Your Craft On @ Today's Creative Blog


Photobucket


craft
The Best Part Of Believe

Photobucket

Monday, April 4, 2011

Cabinet Door Up-do, Pt. 2

In an earlier post, I promised to show you what I did with the next door. Remember this old beat up cabinet door?


I did the same as the other door, using drywall mud to fill in any holes from hinges or door knobs. After it was dry, I sanded it smooth.


I used the other side of the door, giving an illusion of being 2 completely different wall hangings. Once again, I taped off the center & used spray chalk board paint. Using a pencil, I drew lines measuring far enough in that the teeth marks would be cut off. Then, I had the Hubba cut the outer edge. This not only made it a little smaller (again, to appear different than my other sign), it also removed any indication that a dog had chewed the royal corners out of it.

I then proceeded to put 3 coats of Glidden eggshell paint in "Soft Suede" on it. The last coat I used a foam brush & sorta sponged it on for a slightly textured look.


I went through my hardware box to see what I had on hand, and decided I'd use these neat little hanging fobs.


I got those babies placed & nailed on.

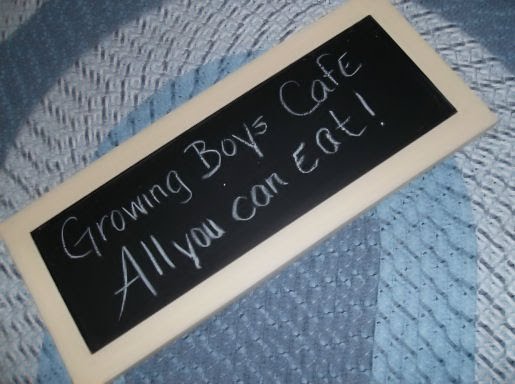
Then, I proceeded to come up with something to write on it. After a few tries, I decided this was perfect for our household. I'm going to have to re-write it, though. Maybe I'll use a ruler so it's straighter before I hang it, LOL.


Wednesday, November 25, 2009

Mini Tote Bags

I can't hold this in any longer! I'm making mini-tote bags. I've got 3 in the works today as we speak. A couple are like the butterfly one pictured below. I'm also working on a scooby-doo one. I'm hoping they'll be launched on Barefoot Denim by tonight. I want to get 5 finished today. These are my "stock" photos...


Sunday, November 15, 2009

I've launched my shoppe

Photobucket

I've been working on a little project for quite some time now. It was actually supposed to be open for business about 14 months ago, but we moved cross country & that was nixed. Anyhoo, I make aprons & tote bags, mainly. The name of my new adventure is Barefoot Denim, and it consists of mostly reused/recycled/rescued items.

I do hope you'll grab a cuppa tea & stop by!

Thursday, August 27, 2009

What say ye, the masses?


I made a small quilt top a couple months ago. I've been looking for the right edging, but the one(s) I bought, I'm just not so sure about. I won't let you know which that/those are, so that you can make an unbiased decision. I am leaning toward (a) certain fabric(s). Let's see if you agree.

So what say ye, the masses? Grouping #1, #2 or #3??? Help!


PS- If you click on the images, I've left them extremely large so you can get a better look at them....


1
2
3


Thursday, April 23, 2009

While I was away, pt 2


I finished the top & am currently looking for a FABULOUS edging for it. I, for some reason, haven't taken pics of the finished top yet though, but I will soon, I promise hope. I've never done a patterned quilt before. They've always been random patchwork. It's not easy & this was only squares, LOL. I drew my plan, and somehow STILL managed to mess it up. So I did the best I could & it's all still symetrical! YAY!!! Will get pics soon of either the top or *hopefully* the finished project.