We've moved!

You should be automatically redirected in 5 seconds. If not, stop by
http://www.vicariouslyvintage.com/
Don't forget to update your bookmarks.

Showing posts with label Selling a house. Show all posts

Saturday, May 21, 2011

A couple pictures...

The day our realtor came out to do a walk through of the house, she didn't take any pictures. We made sure we had 2 rooms in tip top shape for pictures (since we had 4 days between her walk through & the house hitting the market, we didn't get it all done). When I spoke to her the next day I mentioned how weird I thought it was that she didn't take any pics. She told me she'd forgotten to bring her camera. Oops. No biggie. After she left from the walk through, I snapped a few pictures, and I told her I'd email them to her. Here are the shots I got for her to post online.


She did get a picture of the front of the house this past Monday when she put the sign in the ground.

Monday, May 16, 2011

I was featured on Pinkapotamous...

Thank you AmieAnn for showing my clock some love!!

Featured on Pinkapotamus

AmieAnn hosts the Pink Hippo Party every Monday. Check them out for some wonderful projects & ideas. While you're over there, check out the rest of her blog. It's fun!

Unfortunately this week, I won't be able to join the linky parties. Our sale sign went in the ground today for the house, and I am thoroughly exhausted.

Monday, May 9, 2011

WOW!! A quick update!!

The house goes up for show on Monday. 1 week from today. Please pray, not only that the house sells, but that I spend the next week being productive on the few loose ends we have. I'm so nervous. I started sweating once I got off the phone with her.

OK, I need to scream now....


AHHHHHHH. SQUUUEEEEEE!!!

Much better.

Monday, April 25, 2011

2-in-1 Project Updo

I am on a roll. I've got so many cans of spray paint & surfed so many wonderful blogs. My wheels are turning & there's no stopping me now :D

One of the things I've been finding across the web are old window frame updos. I started kicking myself for getting rid of all those windows last summer. There were a LOT. I'd venture to say no less than 30 or 40 of them. Screen windows, glass windows, window frames, different sizes, etc.

I knew we still had a few doors still in the shed, so I went to take a look. I was hoping one of the doors with the glass panes in them might be suitable for cutting down. Above me in the rafters, something begged me to take a look, and I found a few window frames still hidden away. I squealed in delight & looked around for something to stand on to reach them. Amazingly our step stool had not been taken in from a week & a half before when we were cleaning out the shed. I managed to pull down this, among a few other things.

I wasn't sure when I cleaned it up what I had in mind. I had several ideas, but no idea where they'd take me. I thought of taking out all the glass & putting in hardware cloth. I considered frosting all the panes & attaching items to the panes. I thought of leaving 2 clear, 2 frosted. So many ideas. What I ended up doing was so much simpler & it didn't dawn on me what I wanted to do until the last minute.

While I was working on my Scrappy Shelf, I found 3 shadow box style pictures that I wanted to updo as well.... Take note of the green one in the middle :D


Here's the sequence.....

After I cleaned the window with vinegar & a cloth, I used various tool to get out the brittle & nasty pieces of trim that were holding the glass in. Thankfully, the brittle pieces were only on 2 sides of each pane, leaving 2 perfectly sturdy & strong pieces to hold the glass. Keenan wanted to be my photographer the evening I did this. He must have taken 40 pictures. Lucky for you, I only chose the few better ones :D


At some point in time, my darling boy brought me his authentic construction helmet "in case it falls on you, Mom." What a doll!! <3 <3


All done cleaning the brittle trim out!!!


My helper & photographer offered to vacuum up the mess.


One of my other handsome fellas came along & posed for a picture.


While my baby was cleaning up my mess, I scrounged for the caulk gun & found a tube of silicone caulk already open. On the sides that I'd removed the trim, I lightly caulked the edges of the panes.


Once that had dried, I taped & primered the window frame with brush on primer. I was going to go for a distressed white or cream to begin with.


Then I decided since I had already done an antique mirror in semi-gloss black, I'd do the window frame the same, since they'd be in the same room.


After the black coats were done, I removed the tape & started playing with the frosted window spray. I practiced on a couple panes and learned not to spray faux frosting while it's angled up. It ran :-(


No biggie. I broke out the 2 frosted panes. I knew now (after more practice) how to faux spray frost windows.


Oh, look at that! Is that? Was that? Yup, that's the green frame from above. I sprayed that in Satin Nickel, then slightly distressed it.


Then I adhered a piece of burlap cut to size to the inside piece of board, strung some silver beads onto safety pins & using a needle, I threaded some thread through the burlap & tied the safety pins down. "Love, Faith, Joy" (You can click this pic to enlarge it).


Then I laid my window frame on the floor & played for about a minute.


And up on the wall my new & simple masterpiece went.


We're quite chuffed with it. Hubba loves it, too!!!


This post is part of the following linky parties & blog carnivals:

Monday:

Sew Can Do, Craftastic Mondays


Tuesday:


Wednesday:


 http://www.thethriftyhome.com

Thursday:

Beyond The Picket Fence

Sunday, April 24, 2011

The Ladder Shelf

When we decided to put the house on the market, I decided to do something I've wanted for awhile. I needed a fairly slim, low profile shelf for one section of our living room that also housed a built-in shelf. I decided to build a ladder shelf. I looked at some plans online, and thought "I can do that." So I bought some gorgeous pine wood at the local hardware/lumber store. We figured I'd paint it brown to match the painted tables. Once I put it together I realised we don't have a lot of nice *real* wood pieces, so I set out to find the perfect stain.


Enter Menard's and Minwax. And the stain colour called..... Jacobean.


The decor on this shelf, actually this whole corner has been changed a few times, and of course with Easter, we've added some spring & Easter decor. The first picture of the unfinished shelf shows the corner a mess. This was near the beginning of our venture, and we were playing the shuffle game. Shuffle everything from one room to the next. So please excuse the mess.

But yeah, I'm fairly chuffed with the ladder shelf. Oh, and the living room walls are now painted white.

Monday, April 4, 2011

Cabinet Door Up-do, Pt. 2

In an earlier post, I promised to show you what I did with the next door. Remember this old beat up cabinet door?


I did the same as the other door, using drywall mud to fill in any holes from hinges or door knobs. After it was dry, I sanded it smooth.


I used the other side of the door, giving an illusion of being 2 completely different wall hangings. Once again, I taped off the center & used spray chalk board paint. Using a pencil, I drew lines measuring far enough in that the teeth marks would be cut off. Then, I had the Hubba cut the outer edge. This not only made it a little smaller (again, to appear different than my other sign), it also removed any indication that a dog had chewed the royal corners out of it.

I then proceeded to put 3 coats of Glidden eggshell paint in "Soft Suede" on it. The last coat I used a foam brush & sorta sponged it on for a slightly textured look.


I went through my hardware box to see what I had on hand, and decided I'd use these neat little hanging fobs.


I got those babies placed & nailed on.

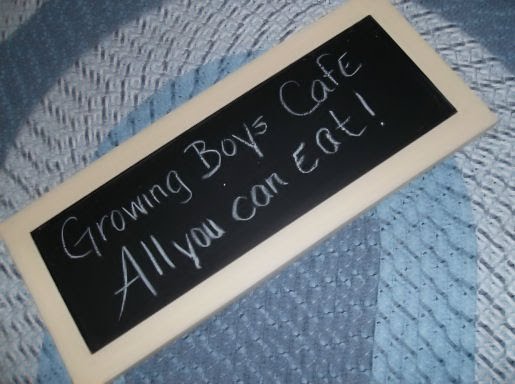
Then, I proceeded to come up with something to write on it. After a few tries, I decided this was perfect for our household. I'm going to have to re-write it, though. Maybe I'll use a ruler so it's straighter before I hang it, LOL.


Tuesday, February 15, 2011

Where the dirty clothes gather....


Staging a home is not only hard & tedious work, it isn't cheap. The first shelves I hit when shopping for the house are clearance racks. I thrift weekly these days to find a score. I scour Amazon in hopes they've knocked down the price on a wish item I've placed in my cart. Craigslist has become a hot spot on my web browser. I've always been one of those "think outside the box" gals, but when you're staging a house, it brings on a whole new meaning. And it still doesn't come cheap.

Another project I can call complete is the master bath cabinet. It was a very dingy white, and quite some time back, we had a mutt that thought everything was her own personal chew toy. Including the cabinet doors.


A couple weeks ago on an out of town venture, Hubba found the doors we were looking for. I'd been looking for a bit in town (and online) to no avail. They've been sitting in the master loo, leaning against the wall since. Until yesterday. I gussied up the strength & started the work. First I had to remove the doors & clean up the hinges. I taped off the walls & floor with tape & newsprint paper. I painted. I painted the cabinet base (sink base?). I painted the doors. 2 coats per side. Today I rehung the doors using the same hardware. The hardware was still in darn good shape. I bought a package of those cushion-y things so the doors don't slam shut.

What a difference!!! I am so psyched!!!

Then I ended up with 2 doors. One in perfectly good shape & my wheels started turning. No spinning..... And I decided we were in need of more wall art.....

Here is the dingy door.....


I filled in the holes with some drywall mud. Dry wall mud & I have become thick as thieves these days. No for real. Like lifelong besties.


I sanded the mud after it had dried & set to painting it. I was going for an aged look, so I used some leftover paint from when we redid the downstairs. It's an off-white, kinda cream colour. True Value something or other. True Value & I are besties these days, too. Anyhoo, the name of the colour began with a C, but please don't ask me the rest of the letters, because I can't remember, and I'm not going out to the garage tonight to look. Capital, maybe.

Anyhoo.....


After a base coat of that True Value paint, I went through my craft paints & found a khaki type colour & black. I decided to try it as a glaze. I watered the khaki one down & found a rag. What's the worst that happens? I hate it & have to re-coat it in Capital(?).

I dipped the rag into the paint & started swiping, being sure to go over the wet paint with the dry side.


Then I added a little bit of the black.....


Rinse. Repeat. Except I didn't rinse anything. Just follow along, ok?


Dry time.....


Then I was ready to tape off the outside part of the door for the part I have been dying (or wanting) to try for oh so long. See, about 2 years or so ago, I bought chalkboard paint..... 2 years ago. I finally tried it.....


I will add 2 sawtooth hangers to the back of this for an on-the-cheap wall hanging for the dungeon laundry room.

If you've enjoyed this project, stay tuned to see what I do with this one:


As promised (though it took me awhile), door number 2 can be found here.